Easy Bucket Hat Crochet Pattern to Try
Create your own stylish accessory with this free and easy bucket hat crochet pattern. Perfect for beginners, personalize for any season!

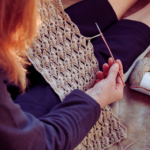
Are you ready to dive into the world of crochet and make something super stylish? Well, grab your hook and yarn because today we’re going to create a fabulous bucket hat that’s perfect for any season! This easy crochet bucket hat pattern is not only free but also simple enough for beginners and fun for seasoned crocheters. Let’s get started!

The Return of the Bucket Hat
Bucket hats have made a surprising comeback in recent fashion trends. Known for their laid-back and versatile style, they have become a staple accessory for both casual and chic outfits. Their resurgence can be attributed to their functionality and the nostalgic appeal they hold for many fashion enthusiasts. Whether you’re pairing it with a summer dress or a winter coat, a bucket hat adds an effortless flair to any look.
Sun Protection with Style
One of the most practical reasons to crochet a bucket hat is the sun protection it offers. The wide brim shields your face and neck from harmful UV rays, making it an essential accessory for outdoor activities. Unlike store-bought hats, a handmade crochet version allows you to customize the brim width to suit your personal style and comfort.
Personalization and Creativity
Creating your own bucket hat gives you the freedom to express your creativity. Choose your favorite colors, try out different patterns, and even add embellishments like beads or appliques. This personal touch not only makes your hat unique but also adds a sense of accomplishment each time you wear it. Moreover, the ability to customize means you can make hats for different seasons, using lightweight yarn for summer and thicker yarns for winter warmth.
What You’ll Need
Before we begin, let’s gather all the materials and tools you’ll need for this project. Don’t worry; you probably have most of these on hand already!
Materials
Choosing the Right Yarn
- Yarn: Choose a lightweight cotton yarn for a summer hat or a wool blend for a cozy winter version. You’ll need about 200 yards. Cotton yarn is breathable and perfect for hot weather, while wool blends provide extra warmth and structure.
Tools of the Trade
- Hook: Use a size H (5mm) crochet hook for a snug, structured fabric. The hook size can affect the tension and overall size of your hat, so make sure to check your gauge.
- Stitch Markers: These will help keep track of your rounds. They are especially useful in preventing you from losing your place in the pattern, ensuring a seamless project.
- Scissors: For cutting your yarn. A sharp pair will make clean cuts, preventing fraying.
- Tapestry Needle: To weave in the ends. It’s essential for finishing your project neatly, hiding all loose ends for a polished look.
Optional Add-ons
Embellishments
Adding embellishments like buttons or patches can personalize your hat even more. These can be sewn on once the hat is complete and can be changed according to your mood or outfit.
Lining
For those who want extra comfort or structure, consider adding a fabric lining to your hat. This can be sewn in after the crochet is complete and provides a smooth surface against your skin.
Getting Started: The Basic Stitches

Crochet Basics Refresher
Before diving into the pattern, let’s brush up on some basic stitches you’ll be using:
Foundation Chain and Single Crochet
- Chain (ch): The foundation of most crochet projects. Chains are the starting point and are crucial for maintaining the shape and size of your project.
- Single Crochet (sc): A simple stitch that creates a tight fabric. It’s perfect for the structure required in a hat, providing durability and warmth.
Adding Texture and Height
- Double Crochet (dc): Adds a bit of height and texture. This stitch is versatile, allowing for more intricate patterns and a looser fabric if desired.
Joining and Starting Techniques
- Slip Stitch (sl st): Used to join rounds or move across stitches. It’s an essential technique for creating seamless joins in round projects like hats.
- Magic Ring: A technique to start your projects in the round. It allows for adjustable tension and a tight center, crucial for the crown of your hat.
Learning Resources
If you’re new to crochet, you might want to check out some tutorial videos online for these stitches. They’re easy to learn and will come in handy for other projects, too! Online platforms offer a variety of resources, from beginner guides to advanced techniques, ensuring that you always have support as you learn.
The Easy Bucket Hat Crochet Pattern
Now, onto the main event! Here’s a step-by-step guide to crocheting your own bucket hat.
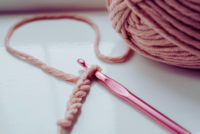
Step 1: Create the Magic Ring
Start with a magic ring. If you’re not familiar with this technique, it’s a clever way to start crocheting in the round without leaving a hole in the center. This technique is particularly useful for hats as it creates a seamless and professional look.
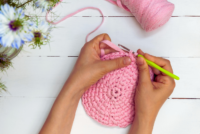
Step 2: Crown of the Hat
- Round 1: Ch 1, work 6 sc into the ring. Join with a sl st to the first sc. (6 sc)This initial round sets the foundation for your hat. Ensure your stitches are even to avoid a lopsided crown.
- Round 2: Ch 1, 2 sc in each st around. Join. (12 sc)Increasing in each stitch helps expand the circle. Keep your tension consistent for a smooth finish.
- Round 3: Ch 1, 1 sc in next st, 2 sc in next st around. Join. (18 sc)This round continues the expansion. Each increase adds to the diameter, shaping the hat to fit comfortably.
- Round 4: Ch 1, 1 sc in next 2 sts, 2 sc in next st around. Join. (24 sc)As the circle grows, it’s crucial to maintain the pattern of increases to ensure the hat fits properly.
- Round 5: Ch 1, 1 sc in next 3 sts, 2 sc in next st around. Join. (30 sc)Continue this pattern until your circle measures about 7 inches in diameter. Adjust the size by adding or subtracting increase rounds to fit different head sizes.
Step 3: Body of the Hat
- Rounds 6-15: Ch 1, sc in each st around. Join. (No increases here; just work even for about 4 inches.)These rounds form the main body of the hat. Ensure consistent tension to maintain the hat’s shape and size.Feel free to add more rounds if you want a deeper hat or less if you prefer a shorter brim. This customization allows for a personalized fit.
4: Creating the Brim
- Round 16: Ch 1, 1 sc in next 4 sts, 2 sc in next st around. Join.Begin increasing again to form the brim. This wider section provides sun protection and adds to the hat’s style.
- Round 17: Ch 1, sc in each st around. Join.Work even for stability in the brim. These rounds help maintain the structure of the brim without further increases.
- Round 18: Ch 1, 1 sc in next 5 sts, 2 sc in next st around. Join.Continue increasing every other round until the brim is as wide as you like. A 2-3 inch brim is usually perfect for sun protection.
Step 5: Finishing Touches
Once you’re happy with the size of your brim, fasten off your yarn and use a tapestry needle to weave in all the ends. This step is crucial for a polished and professional finish. If you want to add a little something extra, consider attaching a crochet flower, a bow, or some cute buttons! These embellishments can transform your hat from simple to stunning.
LINK : Free PDF Files To Try
Tips and Tricks

Ensuring the Perfect Fit
- Gauge Swatch: If you’re using a different yarn or hook size, make a small swatch to check your tension. Adjust your hook size if needed. This step can prevent unnecessary frustration and ensure your hat fits perfectly.
- Color Blocking: Use different colors for the crown, body, and brim for a fun, modern look. This technique adds visual interest and can make your hat stand out.
Finishing Techniques
- Blocking: After finishing your hat, lightly block it to smooth out any wrinkles and set the shape. Blocking helps maintain the structure and fit of your hat over time.
- Storage and Care: Store your hat flat or on a hat stand to maintain its shape. Regular gentle washing and drying flat will keep it looking fresh.
Enjoy Your New Accessory!
There you have it—a stylish and easy crochet bucket hat pattern you can whip up in no time. Whether you’re new to crochet or a seasoned pro, this project is a fun way to add a handmade touch to your wardrobe. Plus, it’s a great gift idea for friends and family!
So what are you waiting for? Grab your yarn and hook, put on your favorite music or podcast, and enjoy the relaxing process of crocheting your very own bucket hat. Happy crocheting!


Understanding Crochet Scarf Measurements for Beginners
Learn how to master crochet scarf measurements with our beginner-friendly guide. Discover...

How to Create a prayer shawl crochet pattern
Create heartfelt and meaningful gifts with our free crochet prayer shawl patterns....

Best Stunning Crochet Shawl Patterns to Try in 2026
Explore stunning crochet shawl patterns for 2026! Perfect for all skill levels,...
Creating a Beautiful Crochet Flower Bouquet
Craft a stunning crochet flower bouquet with our easy-to-follow patterns. Perfect for...


Leave a comment