Tips for Mastering Circular Crochet Techniques
Master the art of circular crochet with our step-by-step guide. Learn how to crochet in the round, create flat circles, and explore creative projects like hats and amigurumi.
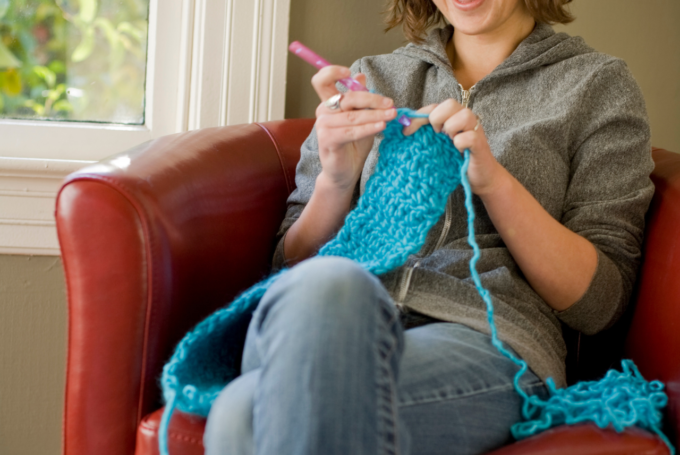
Hey there, crochet enthusiast! If you’ve been looking to add a little twist—or should I say, a curve—to your crochet projects, you’ve come to the right place. Today, we’re diving into the world of circular crochet techniques. Whether you’re a newbie or someone who’s tried crocheting a circle before, I’m here to help you master this skill with some friendly tips and tricks.

Unlocking New Project Possibilities
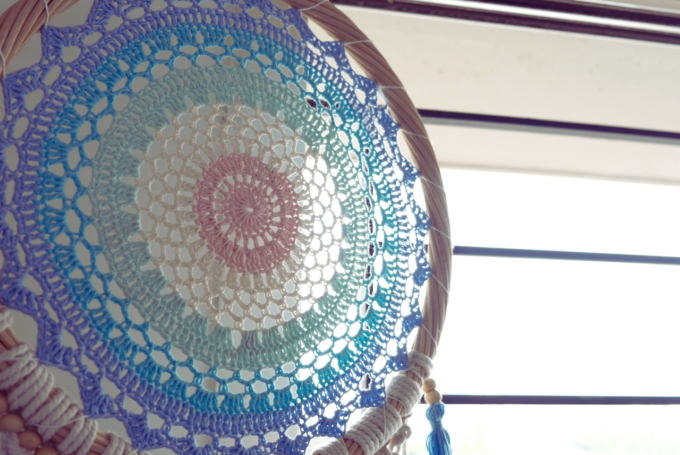
Circular crochet opens up a myriad of creative opportunities that go beyond the traditional flat crochet projects. Once you master this technique, you can create a variety of items such as hats, baskets, and even intricate doilies. The ability to crochet in the round means you can explore new patterns and designs that are not possible with linear crochet projects.
Achieving a Seamless Finish
One of the biggest advantages of crocheting in the round is the seamless finish it provides. When working in rows, you often end up with visible seams that can disrupt the overall aesthetic of your project. Circular crochet eliminates this issue, giving your creations a polished and professional look that is especially desirable in wearables and home decor items.
Exploring Amigurumi and Beyond
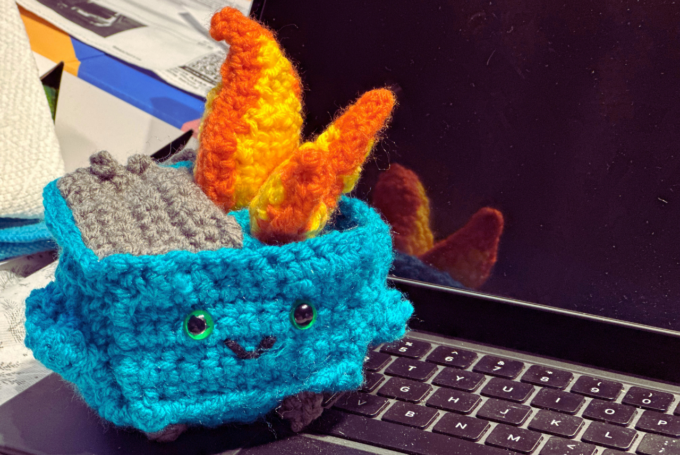
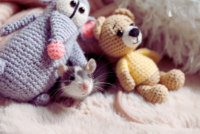
Amigurumi, the art of crocheting small stuffed creatures, relies heavily on circular crochet techniques. By mastering the round, you can delve into the adorable world of amigurumi, crafting everything from tiny animals to whimsical characters. This skill opens the door to endless creative possibilities, allowing you to bring your imaginative ideas to life in three-dimensional form.
Getting Started: The Basics
How to Start a Circle in Crochet
Starting a circle can seem a bit daunting, but it’s easier than you think. To get going, you’ll need a crochet hook and some yarn—easy peasy! The magic circle (also known as the magic ring) is a popular technique for starting a circle because it allows you to pull the center tight, leaving no hole. If the magic circle feels too tricky, don’t worry; you can start with a simple chain and join it into a ring.
Mastering the Magic Circle
The magic circle is a foundational technique in circular crochet that ensures a tight, hole-free center. Begin by wrapping the yarn around your fingers to create a loop, then insert the hook into the loop and pull up a loop. Yarn over and pull through the loop on your hook, then work the required number of stitches into the circle. Pull the yarn tail to close the circle, creating a neat and tidy start to your project.
Alternative Methods: Chains and Rings
If the magic circle proves too challenging, starting with a chain is a great alternative. Create a slip knot and chain a few stitches, then join the last chain to the first with a slip stitch to form a ring. This method is slightly easier and still effective, though it might leave a small hole in the center, which can be minimized by weaving in the tail tightly.
Choosing the Right Hook and Yarn
Selecting the right tools is crucial when starting your circular crochet journey. Use a hook that feels comfortable in your hand and matches the recommended size for your yarn. Experiment with different yarn weights and textures to see which ones work best for your project, keeping in mind that lighter yarns often create more delicate and intricate designs.
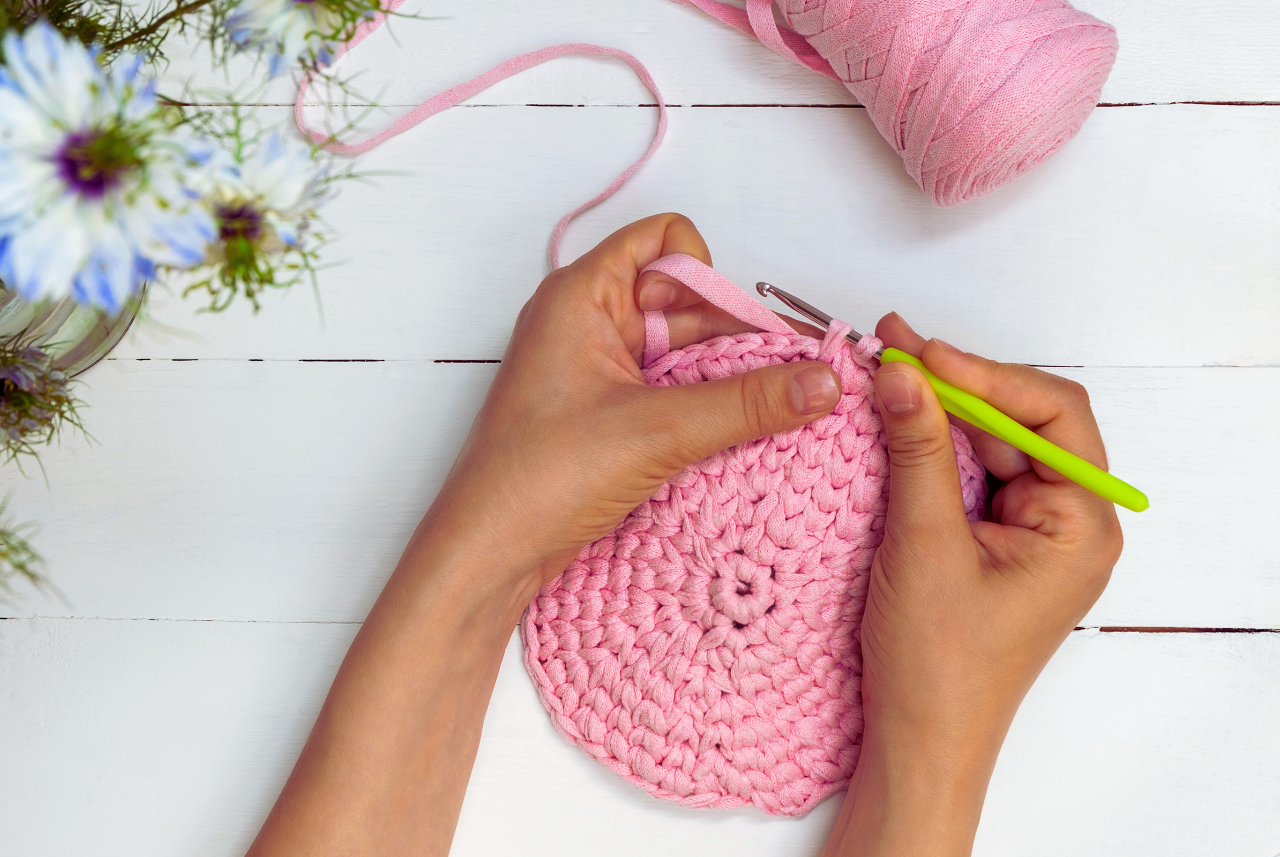
Crochet Circle Tutorial: The First Rounds
Once you’ve got your circle started, it’s time to dive into those first rounds. Here’s a quick step-by-step guide to get you started:
- Magic Circle or Chain: Choose your starting method. For a magic circle, wrap the yarn around your fingers to create a loop. For a chain, create a slip knot and chain a few stitches, then join to form a ring.
- First Round: Work single crochet stitches into the ring. If you used a magic circle, pull the yarn tail to tighten the loop.
- Increasing Rounds: For a flat circle, you’ll need to increase stitches regularly. Double the number of stitches in the second round, then increase evenly in each subsequent round.
Working the First Few Rounds
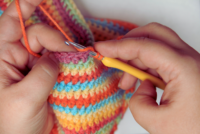
Begin by working single crochet stitches into your chosen starting method. For a magic circle, insert your hook into the loop, yarn over, and pull up a loop. Yarn over again and pull through both loops on the hook. Repeat this process for the required number of stitches, then pull the yarn tail to close the circle tightly. If using a chain, work your single crochets into the ring formed by joining your chain.
Understanding the Importance of Increases
Increasing is essential for maintaining a flat circle. In the first round, you double the number of stitches, ensuring the circle expands evenly. In subsequent rounds, continue to increase by spacing additional stitches evenly throughout the round. This balanced approach prevents your circle from curling up or becoming wavy as it grows.
Using Markers for Better Tracking
Stitch markers are invaluable when working in the round. Place a marker at the beginning of your round to keep track of your starting point. As your circle expands, it becomes easier to lose track of where each round begins and ends. Markers help maintain your place, allowing you to focus on stitch counts and increases without getting lost.
Perfecting the Art: Tips and Tricks
How to Make a Flat Circle
The secret to making a flat circle lies in your increases. If you want to crochet a flat circle, follow these tips:
- Regular Increases: In each round, increase the number of stitches by the number of stitches in the first round (e.g., if you start with 6 stitches, increase by 6 in each round).
- Stitch Markers: Use stitch markers to keep track of the beginning of your rounds. This will help you avoid losing your place, especially as your circle grows.
- Count Your Stitches: It’s easy to lose count, so make sure you count your stitches regularly to ensure you’re on track.
Maintaining Consistent Increases
Consistent increases are key to achieving a flat circle. Begin by doubling the number of stitches in the first round, then strategically place additional increases in subsequent rounds. Ensure your increases are evenly spaced to maintain balance, preventing any unwanted ripples or curls as your circle expands.
The Role of Tension in Flat Circles
Tension plays a crucial role in the outcome of your circle. Maintain an even tension throughout your work to prevent accidental increases or decreases. If your circle starts to curl, check your tension and adjust as needed. Sometimes, using a larger hook can help loosen your stitches and achieve a flatter result.
Using Visual Guides and Patterns
Visual guides and patterns are excellent resources for perfecting your flat circle technique. Many crochet patterns provide detailed instructions and diagrams to help you understand the placement of increases. Following these guides can give you a clearer understanding of how to structure your circle and achieve the desired shape.
Circular Crochet Stitches: Spice Things Up!
Once you’ve got the basics down, why not add some flair with different stitches? Here are a few ideas to play with:
- Double Crochet: Adds height and texture to your projects.
- Half Double Crochet: A nice middle ground for texture and speed.
- Shell Stitches: Create a scalloped edge or fun pattern within your circle.
Exploring the Double Crochet Stitch
Double crochet stitches add height and texture, making them perfect for creating raised patterns within your circle. To work a double crochet, yarn over, insert your hook into the stitch, yarn over again, pull up a loop, yarn over, pull through two loops, yarn over once more, and pull through the remaining two loops. This versatile stitch allows for creative expression within your projects.
The Versatility of Half Double Crochet
Half double crochet is a versatile stitch that offers a balance between texture and speed. It creates a slightly raised effect without the height of a double crochet. To work a half double crochet, yarn over, insert your hook into the stitch, yarn over, pull up a loop, yarn over again, and pull through all three loops on the hook. This stitch is ideal for adding subtle texture to your circular projects.
Creating Patterns with Shell Stitches
Shell stitches introduce a decorative element to your circles, forming scalloped edges or intricate patterns. A typical shell consists of several stitches worked into the same space, often alternating between double and single crochets. Experiment with different shell sizes and placements to achieve unique designs, adding a touch of elegance and complexity to your work.
Troubleshooting Common Issues
Why Is My Circle Turning Into a Bowl?
If your circle starts to curl up like a bowl, it might be because of too few increases. Make sure you’re increasing enough in each round to keep your circle flat. If it’s still curling, try using a larger hook size or loosening your tension a bit.
Adjusting Your Increase Strategy
To prevent bowl-shaped circles, revisit your increase strategy. Ensure you are consistently adding the correct number of increases in each round. If your circle continues to curl, consider adding more increases or adjusting the placement of your stitches. Small tweaks in your increase pattern can make a significant difference in the flatness of your circle.
Evaluating Hook Size and Tension
Hook size and tension are critical factors in avoiding a bowl-shaped circle. If your circle curls despite proper increases, try switching to a larger hook size to loosen your stitches. Additionally, evaluate your tension; if it’s too tight, your stitches may pull inwards, causing the circle to curl. Loosen your grip slightly to allow the circle to lay flat.
Understanding Yarn Behavior
Different yarns can behave differently when crocheted in the round. Some fibers may naturally have more elasticity, contributing to curling. Experiment with different types of yarn to find one that works well with your tension and hook size. Swatching with various yarns can help you identify the best options for flat circles.
How to Fix a Wavy Circle
Wavy circles are usually the result of too many increases. Try reducing the number of increases or adjusting your stitch tension to smooth things out.
Balancing Increases for Smoothness
Wavy circles often occur when there are too many increases in a round. Reevaluate your increase pattern and try reducing the number of increases. Focus on achieving a balanced distribution of stitches, ensuring each round expands evenly without excess bulk that leads to waviness.
Fine-Tuning Your Stitch Tension
Stitch tension plays a pivotal role in the appearance of your circle. If your circle is wavy, your tension may be too loose, causing the stitches to fan out excessively. Tighten your grip slightly and maintain a consistent tension throughout your work. A more controlled tension can help smooth out any unwanted waves.
Experimenting with Different Stitches
Different stitches can affect the overall texture and appearance of your circle. If waviness persists, experiment with various stitch types and combinations. Sometimes, incorporating a mix of stitches, such as alternating between single and half double crochets, can create a more balanced and visually appealing circle.
Projects to Try with Circular Crochet

Coasters: Quick and Fun
Coasters are an excellent beginner project for practicing circular crochet. They are quick to complete and offer a practical use for your newfound skills. Experiment with different yarn colors and textures to create a set of personalized coasters that add a touch of handmade charm to your home.
Exploring Color Combinations
Coasters provide the perfect canvas for experimenting with color combinations. Use contrasting or complementary colors to create visually striking designs. Consider incorporating stripes, color blocks, or even ombre effects to enhance the aesthetic appeal of your coasters and add a pop of color to your table settings.
Adding Decorative Edges
Once you’ve mastered the basic coaster shape, consider adding decorative edges to elevate their appearance. Explore techniques like picot edging or shell stitches to create intricate borders. These additional details can transform simple coasters into elegant and eye-catching pieces.
Using Different Yarn Types
Experimenting with different yarn types can give your coasters unique textures and appearances. Try using cotton yarn for a sturdy and absorbent coaster, or opt for a soft acrylic yarn for a more delicate and decorative piece. Mixing yarn weights and fibers can result in diverse coaster sets with varying tactile qualities.
Hats: Elevate Your Circular Skills
Once you’ve mastered the flat circle, you can easily move on to creating hats by adding more rounds and increasing the height.
Crafting the Perfect Fit
Creating a hat involves not only mastering the circular base but also achieving the perfect fit. Measure the head circumference of the intended wearer and adjust your stitch count accordingly. Consider the elasticity of your chosen yarn and the effect it will have on the hat’s fit, ensuring a comfortable and snug wear.
Exploring Different Hat Styles
Hats come in various styles, from beanies to berets to slouch hats. Experiment with different shapes and silhouettes to find the style that suits your preferences. Incorporate different stitch patterns, such as ribbing or cables, to add texture and visual interest to your hats, making them unique and personalized.
Adding Embellishments and Details
Enhance your hats with embellishments like pom-poms, buttons, or appliqués. These details can add a playful or sophisticated touch to your creations. Consider incorporating color changes or stripes to create visually dynamic hats that showcase your creativity and crochet skills.
Amigurumi: A Fun and Challenging Adventure
These cute little crocheted creatures often start with a circle, making them a fun challenge for your new skills.
Understanding Amigurumi Basics
Amigurumi involves crocheting in the round to create three-dimensional shapes, often starting with a magic circle. Familiarize yourself with the basic construction techniques, such as increasing, decreasing, and shaping, to bring your amigurumi characters to life. Experiment with different yarn weights and hook sizes to achieve the desired size and texture.
Exploring Creative Character Design
Amigurumi allows for endless creativity in character design. Start with simple animals or objects, then branch out into more complex designs as you gain confidence. Consider incorporating features like embroidered eyes, felt accents, or tiny accessories to give your amigurumi creations personality and charm.
Building a Collection of Characters
Once you master the basics, challenge yourself to create a collection of amigurumi characters. Design a series of themed creatures, such as woodland animals or fantasy creatures, and explore different color schemes and patterns. Building a collection not only hones your skills but also provides a delightful showcase of your crocheting journey.
A Few More Tips for Success
Practice, Practice, Practice
Like any skill, the more you practice, the better you’ll get. Try different yarns and hooks to see what works best for you.
Setting Aside Dedicated Practice Time
Dedicate specific time slots in your schedule for practicing circular crochet. Consistency is key to improvement, so aim to practice regularly, even if it’s just a few minutes each day. Gradually increase the complexity of your projects as you become more comfortable with the techniques.
Experimenting with Different Materials
Experimenting with a variety of yarns and hooks can significantly impact your crochet experience. Try working with different yarn weights, textures, and fibers to see how they affect your stitches and overall project outcomes. This experimentation will help you develop a deeper understanding of how materials influence your crochet work.
Documenting Your Progress
Keep a crochet journal to document your progress and note any challenges or successes you encounter. Record the yarns, hooks, and patterns you use for each project, along with any modifications you make. This journal will serve as a valuable resource for future reference and allow you to track your growth as a crocheter.
Join a Crochet Community
There are tons of online forums, Facebook groups, and YouTube channels dedicated to crochet. Joining a community can offer support, inspiration, and new ideas.
Engaging with Online Forums
Online forums provide a platform for crocheters to share their experiences, ask questions, and offer advice. Engaging with these communities allows you to connect with like-minded individuals, exchange tips, and gain insights into new techniques and trends. Participate in discussions, ask for feedback, and share your own projects to foster a sense of camaraderie.
Exploring YouTube Tutorials
YouTube is a treasure trove of crochet tutorials covering a wide range of techniques and projects. Explore different channels to find instructors whose teaching styles resonate with you. Video tutorials offer visual guidance and step-by-step instructions, making it easier to learn and master new circular crochet techniques at your own pace.
Participating in Crochet-Alongs
Crochet-alongs (CALs) are communal crochet projects where participants work on the same pattern simultaneously. Joining a CAL allows you to learn from others, share your progress, and celebrate your achievements together. These events often come with dedicated support groups and forums where you can seek help and encouragement throughout the project.
Have Fun
Most importantly, enjoy the process. Crocheting is a rewarding and relaxing hobby, so don’t stress too much about perfection.
Embracing Imperfections
Remember that crochet is an art form, and imperfections are a natural part of the creative process. Embrace any minor mistakes as opportunities to learn and grow. Focus on the enjoyment of creating something with your hands rather than striving for absolute perfection. The beauty of crochet lies in its handmade charm and uniqueness.
Exploring New Techniques
Keep your crochet journey exciting by exploring new techniques and patterns. Challenge yourself to learn advanced stitches, experiment with colorwork, or try your hand at intricate lacework. Pushing your boundaries and expanding your skill set will keep your crochet experience fresh and fulfilling.
Celebrating Your Achievements
Take time to celebrate your crochet achievements, no matter how small. Whether you’ve completed a challenging project or mastered a new stitch, acknowledge your progress and be proud of your accomplishments. Share your finished projects with friends, family, or online communities to receive encouragement and feedback, fostering a sense of accomplishment and motivation.
There you have it, my friend! With these tips and tricks, you’re well on your way to mastering circular crochet techniques. Whether you’re crafting cozy hats or cute little animals, the world of circular crochet is full of possibilities. So grab your hook, pick your favorite yarn, and start creating your round masterpieces today! Happy crocheting!


Exploring types of crochet patterns stitches Techniques
Discover the art of different kinds of crochet stitches with our detailed...

Understanding Crochet RS: Techniques and Tips
Master crochet RS techniques and terms with our guide. Discover what RS...
Step-by-Step Guide to Crochet Joined Rounds
Learn how to master crochet joined rounds with this step-by-step guide. Enhance...
How to teach someone to crochet
Master the art of teaching crochet with step-by-step lessons. Learn how to...

Leave a comment