Creative Octopus Crochet Pattern for Beginners
Dive into the world of crochet with an easy octopus crochet pattern perfect for beginners! Create a cute, plush octopus using our simple, free pattern guide.
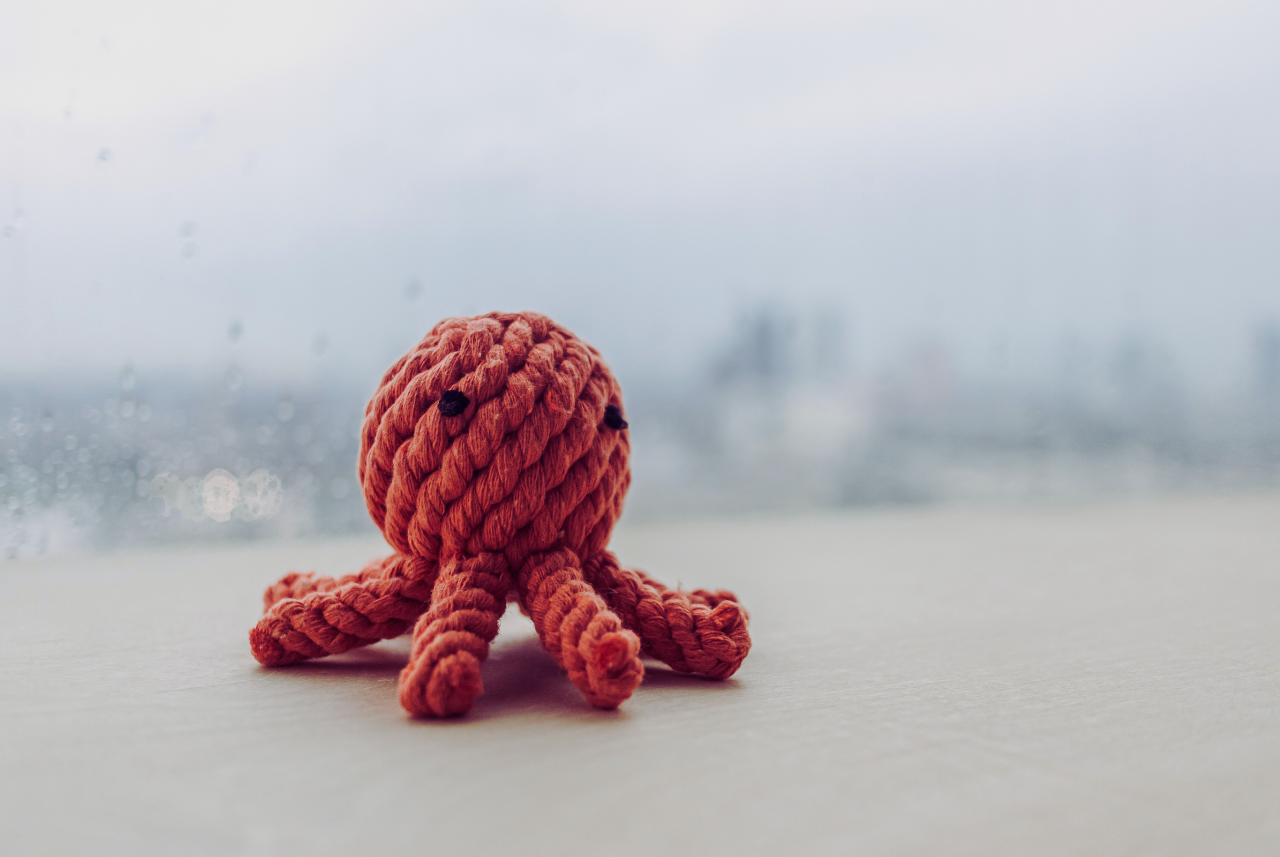
Hey there, crochet enthusiasts! Ready to dive into the world of crochet with a fun and easy project? Whether you’re a newbie or just looking for a quick, adorable project, this Creative Octopus Crochet Pattern is perfect for you. Let’s get those hooks ready and make a cute little octopus that’s sure to bring a smile to anyone’s face! Crocheting can be both relaxing and rewarding, offering a blend of creativity and skill-building. By the time you finish this project, you’ll not only have a charming octopus but also a newfound confidence in your crochet abilities.
 Why Crochet an Octopus?
 Why Crochet an Octopus?
Crocheting an octopus is not only a delightful way to spend your time, but it also makes for a wonderful gift or a cute decoration for your home. Plus, this project is beginner-friendly and doesn’t require advanced skills. You’ll learn some basic stitches and, before you know it, you’ll have a charming crochet octopus to show off!
A Gift That Delights
An octopus can be an incredibly thoughtful gift. Its unique shape and cuddly texture make it appealing to all ages. Imagine the joy on a child’s face when they receive this handmade toy, or the appreciation from a friend who loves nautical themes. The personal touch of a handmade gift often conveys more sentiment than store-bought items. Plus, you can tailor the octopus to the recipient’s favorite colors or styles, making it even more special.
Decor with a Twist
Beyond being a gift, a crochet octopus can be a whimsical addition to your home decor. Place it on a bookshelf, add it to a nursery, or let it sit cheerfully on your desk. Its playful design brings a touch of fun and creativity to any space, making it a conversation starter. You could even create a family of octopuses in various sizes to form a delightful display.
Building Your Skills
This project is a fantastic way to practice and perfect basic crochet techniques. As you progress, you’ll gain confidence in handling yarn and manipulating stitches. The octopus pattern incorporates foundational skills such as increasing, decreasing, and working in the round. By completing this project, you’ll be better prepared for more complex crochet endeavors.
What You’ll Need
Before we get started, let’s gather our supplies. Here’s what you’ll need to create your very own crochet octopus:
- Yarn: Choose a color you love! Soft, medium-weight yarn works best for this project.
- Crochet Hook: A size suitable for your chosen yarn, usually 4mm (G) or 5mm (H) works well.
- Stuffing: Polyfill or any stuffing material to give your octopus its shape.
- Scissors: For cutting yarn.
- Tapestry Needle: To weave in ends and sew pieces together.
- Safety Eyes: Optional, but they add a cute touch to your octopus.
- Stitch Marker: Helps keep track of your rounds.
Selecting the Perfect Yarn
Choosing the right yarn is crucial for your crochet octopus. Opt for a soft, medium-weight yarn, which ensures your octopus is both cuddly and durable. Consider colors that match your personal style or the preferences of the recipient. Variegated yarns can add a fun, multicolored effect to your creation. Ensure that your yarn is easy to work with, especially if you’re a beginner, as this will make the crocheting process smoother.
Essential Tools for Success
A well-selected crochet hook can make all the difference. Typically, a 4mm (G) or 5mm (H) hook is recommended for medium-weight yarn, providing the right tension and ease of use. Ensure your scissors are sharp for neat yarn cuts, and a tapestry needle is a must for finishing touches. Safety eyes can elevate the cuteness of your octopus, but if you prefer a more traditional look, you can embroider the eyes.
Preparing Your Workstation
Set up a comfortable workstation before you begin. A well-lit area with a spacious surface will help you keep track of your tools and yarn. Organize your materials within arm’s reach to minimize distractions. Consider using a soft mat or cushion to support your wrists during longer crocheting sessions. A stitch marker is invaluable for keeping track of your rounds, especially if you’re new to crocheting in the round.
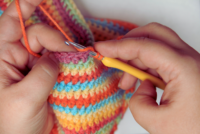
Basic Crochet Stitches
If you’re new to crochet, here are a few basic stitches you’ll need to know:
- Chain (ch): The foundation of most crochet projects. Simply yarn over and pull through the loop on your hook.
- Single Crochet (sc): Insert hook, yarn over, pull through, yarn over again, and pull through both loops.
- Slip Stitch (sl st): Insert hook, yarn over, pull through both the loop on the hook and the loop you inserted into.
Mastering the Chain Stitch
 Mastering the Chain Stitch
The chain stitch is the backbone of many crochet projects. Practice makes perfect, so start by making several chains to get comfortable with the motion. Maintain consistent tension to ensure even stitches, which will result in a more professional-looking final product. As you practice, you’ll find a rhythm that works best for you, making the process more enjoyable and efficient.
Perfecting the Single Crochet
The single crochet stitch is a versatile technique used in various projects. It forms a dense, sturdy fabric ideal for stuffed toys like our octopus. Focus on maintaining a steady tension and uniform stitch size. Try practicing this stitch in rows before moving on to working in the round, which will be crucial for forming the octopus’s head and tentacles.
Slip Stitch Simplified
The slip stitch is a simple yet essential stitch used for joining and finishing. It creates a seamless transition between stitches and rounds. Practice inserting your hook smoothly into the desired stitch, as this will help you master this technique. Understanding the slip stitch will be useful when you finish the tentacles and weave in your ends for a tidy, polished look.
Let’s Crochet the Octopus!
Step 1: Create the Head
- Magic Ring: Start with a magic ring and work 6 single crochets into the ring. Pull it tight to close the loop.
- Round 1: Increase by making 2 single crochets in each stitch around (12 stitches).
- Round 2: 1 single crochet in the next stitch, 2 single crochets in the next stitch; repeat around (18 stitches).
- Round 3: 1 single crochet in the next 2 stitches, 2 single crochets in the next stitch; repeat around (24 stitches).
- Rounds 4-6: Single crochet in each stitch around (24 stitches).
Understanding the Magic Ring
The magic ring technique is a game-changer for crocheting in the round. It creates a tightly closed circle, perfect for starting projects like our octopus. Practice forming the ring and crocheting into it until you’re comfortable with the process. This skill will be invaluable as you take on other amigurumi and round-based projects.
Increasing with Confidence
Increasing stitches evenly is key to shaping your octopus’s head. Focus on maintaining consistent tension as you add stitches, which will keep your work neat and uniform. Use a stitch marker to mark the beginning of each round, helping you keep track of your increases. As you practice, increasing will become second nature, allowing you to focus on enjoying the creative process.
Maintaining the Shape
Rounds 4-6 involve crocheting in each stitch, which helps maintain the round shape of the head. Ensure your tension is steady to avoid any lumps or unevenness. If you notice any issues, don’t hesitate to unravel a few stitches and correct them. This attention to detail will ensure your octopus has a smooth, professional appearance.
Step 2: Form the Tentacles
- Round 7: 1 single crochet in the next 2 stitches, decrease in the next stitch; repeat around (18 stitches).
- Round 8: 1 single crochet in the next stitch, decrease in the next stitch; repeat around (12 stitches).
Fill the head with stuffing until it’s nice and firm. Now for the tentacles!
Decreasing Done Right
Decreasing stitches is crucial for shaping the body and transitioning to the tentacles. Practice the technique of crocheting two stitches together to ensure a smooth decrease. Keep your decreases even to avoid bumps and ensure the octopus’s body maintains a uniform shape. Proper decreasing will help your octopus stand out with clean lines and a polished look.
Stuffing for Structure
As you decrease, begin stuffing the head to maintain its shape and firmness. Use small amounts of stuffing at a time to avoid lumps. Distribute the stuffing evenly, checking periodically to ensure the octopus remains symmetrical. Proper stuffing will give your octopus a professional finish and make it a joy to hold.
Preparing for Tentacles
With the head shaped and stuffed, it’s time to focus on the tentacles. These add character and charm to your octopus. Visualize the placement of each tentacle, ensuring they are evenly spaced. This step sets the stage for the final, delightful part of your crochet project.
Step 3: Crochet the Tentacles
- Tentacle Round: Chain 10, slip stitch back down the chain and into the next stitch in the head; repeat around.
Crafting Curls
Creating the tentacles is where your octopus gains its playful personality. Each chain forms a delightful curl, adding to the charm of your creation. Experiment with different chain lengths to vary the tentacle sizes, giving your octopus a unique look. As you crochet, picture each tentacle as a lively, waving arm, ready to bring joy.
Ensuring Even Spacing
Attention to detail ensures the tentacles are evenly distributed. Use a stitch marker to keep track of your starting point, making it easier to maintain symmetry. Carefully count your stitches and chains to avoid any discrepancies. The result will be a balanced, eye-catching octopus that showcases your crochet skills.
Adding a Touch of Whimsy
Feel free to experiment with different tentacle styles. Consider adding extra chains for longer tentacles or using a combination of chain lengths for variation. This creative freedom allows you to personalize your octopus, making it truly one-of-a-kind. Embrace the opportunity to infuse your work with your personality and flair.
Step 4: Finishing Touches
- Attach Safety Eyes: If using, attach them between rounds 4 and 5, about 6 stitches apart.
- Stuff the Head: Add more stuffing if needed.
- Weave in Ends: Use the tapestry needle to weave in any loose ends.
And voila, your adorable octopus is ready to cuddle!

Adding the Eyes
Safety eyes bring life and expression to your octopus. Carefully position them to give your creation a friendly, approachable appearance. If you prefer a more traditional look, consider embroidering the eyes with black yarn or embroidery floss. The eyes are the window to your octopus’s personality, so take your time to achieve the perfect placement.
Final Stuffing Adjustments
With the eyes attached, ensure the head is adequately stuffed. Add more stuffing if needed to give it a firm, rounded shape. Proper stuffing will ensure your octopus is huggable and retains its shape over time. Take care to maintain a smooth surface, avoiding any lumps or unevenness.
Tying Up Loose Ends
The final step is weaving in loose ends, which gives your octopus a polished, professional finish. Use a tapestry needle to carefully hide the yarn tails within the stitches. This attention to detail ensures your creation looks neat and tidy, ready to be admired by all who see it.
Tips and Tricks
- Color Fun: Try using variegated yarn for a multi-colored octopus or make each tentacle a different color for a funky look.
- Size Variations: Use thicker yarn and a larger hook for a bigger octopus, or thinner yarn and a smaller hook for a tiny one.
- Personalize It: Add a little smile with embroidery floss or sew on some cute buttons for extra character.
Exploring Color Possibilities
Experimenting with colors can transform your octopus into a true work of art. Variegated yarn creates delightful color transitions, adding depth and interest to your creation. Alternatively, using different colors for each tentacle can make your octopus pop with personality. Consider the color scheme to reflect your personal style or the theme of the space where it will be displayed.
Adjusting Size to Suit
Varying the size of your octopus is as simple as changing your yarn and hook. A larger hook and thicker yarn will yield a bigger, more plush octopus, perfect for cuddling. Conversely, a smaller hook and thinner yarn create a petite, delicate version, ideal for decoration or keychains. This flexibility allows you to customize your project to suit your needs and preferences.
Adding Character
Personalizing your octopus adds a special touch. Consider embroidering a smile or adding buttons for eyes to give your creation a unique expression. These small details can enhance the octopus’s charm and make it truly one-of-a-kind. Let your imagination run wild, creating a character that reflects your personality and creativity.
Free Printable Crochet Octopus Pattern
For those who love having a guide at hand, we’ve got you covered! Download our free printable crochet octopus pattern PDF to keep by your side as you work. It’s perfect for quick reference and easy to follow.
The Benefits of a Printable Guide
Having a physical pattern at hand can be incredibly helpful, especially for beginners. It allows you to mark your progress, jot down notes, and keep track of your place in the pattern. A printed guide is also portable, letting you crochet on the go without needing a screen. This can enhance your focus and enjoyment of the process.
Easy-to-Follow Instructions
Our printable pattern is designed with clarity in mind, featuring step-by-step instructions and helpful tips. It breaks down each stage of the project, making it accessible and manageable for crocheters of all levels. Having a clear guide reduces frustration and ensures you can complete your octopus with confidence and ease.
A Handy Reference
A printed pattern serves as a handy reference for future projects. As you build your crochet skills, you’ll appreciate having a library of patterns to revisit and adapt. Whether you’re making another octopus or applying techniques to new projects, a printed guide is an invaluable resource in your crocheting journey.
Share Your Creation!
We’d love to see your creative crochet octopus! Share your finished project with us on social media using the hashtag #CreativeCrochetOctopus. We might even feature your masterpiece in our next blog post!
Joining the Community
Sharing your crochet work connects you with a vibrant community of fellow enthusiasts. Engaging with others who share your passion can provide inspiration, support, and valuable feedback. It’s a wonderful way to celebrate your achievements and learn from others’ experiences.
Inspiring Others
Your creation might inspire someone else to start their own crochet journey. Seeing your work can motivate others to try their hand at crafting, sparking new ideas and projects. By sharing your octopus, you’re contributing to a cycle of creativity and encouragement within the crochet community.
Recognition and Feedback
Sharing your work can also lead to recognition and constructive feedback. Being featured on our blog or receiving comments from fellow crocheters can boost your confidence and inspire you to take on new challenges. It’s an opportunity to showcase your skills and receive appreciation for your hard work.
In conclusion, crocheting an octopus is not only easy but also a joyful project that you can finish in an afternoon. So grab your yarn, follow this simple pattern, and enjoy the art of crafting a delightful octopus. Happy crocheting!


Exploring types of crochet patterns stitches Techniques
Discover the art of different kinds of crochet stitches with our detailed...

Understanding Crochet RS: Techniques and Tips
Master crochet RS techniques and terms with our guide. Discover what RS...
Step-by-Step Guide to Crochet Joined Rounds
Learn how to master crochet joined rounds with this step-by-step guide. Enhance...
How to teach someone to crochet
Master the art of teaching crochet with step-by-step lessons. Learn how to...

Leave a comment