How to follow a crochet pattern
Master the art of crochet with this comprehensive crochet pattern guide. Learn how to read stitch patterns, decode instructions, and tackle crochet diagrams, perfect for beginners and enthusiasts alike.
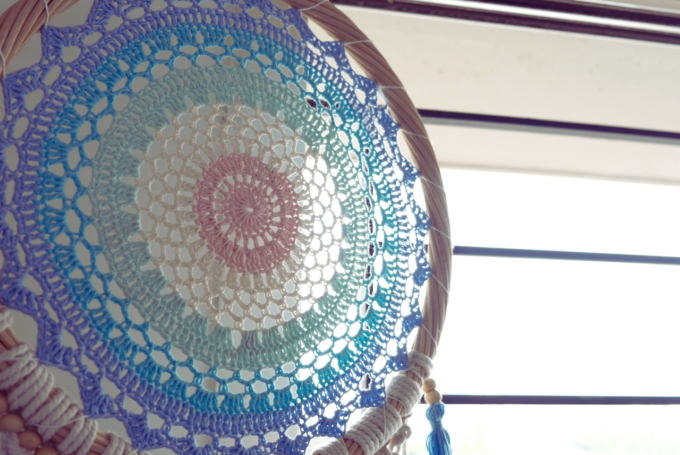
Hey there, crochet enthusiast! Whether you’re just starting or you’ve been crocheting for a while, learning how to follow a crochet pattern can open up a whole new world of creative possibilities. With patterns, you can craft everything from intricate doilies to cozy blankets, and the satisfaction of completing a project is unparalleled. Let’s dive into the basics and make sense of those seemingly cryptic instructions, equipping you with the confidence to tackle any crochet challenge.

A crochet pattern is like a recipe, but instead of cooking a delicious meal, you’re creating something beautiful with yarn. It’s a set of instructions that tell you what to do step by step, meticulously guiding you from a ball of yarn to a finished masterpiece. While it might seem daunting at first, understanding the structure of a pattern can help demystify the process.
General Information Overview
Patterns usually start with some general information: the size of the finished project, the materials you need (like yarn and hook size), and the gauge (how many stitches per inch). This introductory section is crucial as it sets the stage for your project, ensuring you gather the necessary materials and understand what you’re aiming to achieve. The gauge is particularly important; it ensures that your finished piece will match the dimensions specified in the pattern.
Materials and Tools
Before you begin crocheting, it’s essential to gather the right materials. The pattern will specify the type and amount of yarn required, which directly affects the texture and appearance of your final product. Additionally, the recommended hook size is crucial for maintaining the appropriate tension and stitch size. Some patterns may also suggest additional tools like stitch markers or tapestry needles for finishing touches.
Decoding the Instructions
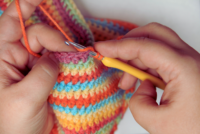
Once you’ve familiarized yourself with the general information, it’s time to dive into the step-by-step instructions. Don’t worry if it looks confusing at first we’re here to decode it together! Each step is a building block, guiding you through the process one stitch at a time. With patience and practice, these instructions will become second nature, allowing you to focus on the joy of creating.
Understanding Crochet Language
Crochet has its own unique language, filled with abbreviations and symbols that might seem like a foreign code to beginners. But fear not once you understand these terms, you’ll be able to navigate patterns with ease.
Crochet Abbreviations
Crochet patterns use a bunch of abbreviations to save space and make patterns quicker to read. Here are some common ones:
- ch: chain
- sc: single crochet
- dc: double crochet
- tr: treble crochet
- sl st: slip stitch
These are just a few examples. Each pattern usually includes a list of abbreviations used, so you’ll always have a guide on hand. Familiarizing yourself with these terms will speed up your reading process, allowing you to focus on the creative aspect of crocheting.
Expanding Your Abbreviation Knowledge
Beyond the basic stitches, patterns might introduce more complex abbreviations like “hdc” for half double crochet or “bpdc” for back post double crochet. Each new abbreviation opens up a new technique, adding depth and texture to your projects. As you encounter unfamiliar terms, take the time to practice them separately before incorporating them into your main project.
Crafting Confidence with Abbreviations
Initially, abbreviations might slow you down, but with practice, they become second nature. Try creating flashcards with abbreviations on one side and their meanings on the other to test your knowledge. As you grow more comfortable, you’ll find yourself reading patterns with ease, translating abbreviations into stitches almost instinctively.
Pattern Meanings and Directions
When you see something like “ch 5” or “2 dc in next st,” it’s just shorthand for “chain 5 stitches” and “make 2 double crochet stitches in the next stitch,” respectively. Once you get the hang of it, you’ll be reading these patterns like a pro!
Breaking Down Complex Instructions
Patterns can sometimes seem like a jumble of letters and numbers, but breaking them down step by step can simplify the process. When faced with a challenging section, take it slow—understand each instruction before moving to the next. This methodical approach prevents mistakes and builds confidence.
Visualizing the Process
If a particular instruction seems unclear, try visualizing the steps or sketching them out. Many crocheters find it helpful to draw simple diagrams or use physical objects to represent stitches. This visualization aids in comprehending the flow of the pattern, making it easier to follow along.
Practice Makes Perfect
Repetition is key in mastering pattern reading. Start with simple projects and gradually work your way up to more complex patterns. With each completed project, your understanding and confidence will grow, preparing you for more intricate designs.
How to Read Crochet Instructions

Reading crochet instructions might feel overwhelming initially, but breaking it down into manageable parts can simplify the process. With patience and practice, you’ll find yourself following patterns with ease and confidence.
Step-by-Step Guide for Beginners
- Start with the Materials: Make sure you have everything you need. The pattern will tell you exactly what to get, so you won’t have to guess. Having all materials on hand prevents interruptions and allows you to focus entirely on the creative process.
- Check the Gauge: This step is crucial. It ensures that your final project turns out the right size. To check gauge, you’ll crochet a small swatch using the recommended yarn and hook, then measure it. Adjust your hook size if needed to match the pattern’s gauge.
- Understand the Pattern Structure: Most patterns are broken down into sections, like the body, sleeves, or edging, if you’re making a garment. Each section will have its own set of instructions. Familiarizing yourself with this structure helps in visualizing the project’s progression.
- Follow the Instructions: Start at the beginning and work your way through the pattern. If you don’t understand something, don’t worry! Just take it one step at a time. Utilize online resources or crochet groups for assistance if needed.
- Use Stitch Markers: These handy little tools can help you keep track of where you are in the pattern, especially if you’re working on something complex. They are lifesavers in projects with repetitive patterns or intricate designs.
Building a Routine
Establishing a routine for reading and following instructions can enhance your crocheting experience. Set aside a dedicated time and space for crochet, ensuring minimal distractions. This habit fosters a focused environment, allowing you to immerse yourself in the pattern.
Embracing Mistakes as Learning Opportunities
Mistakes are inevitable, especially for beginners. Instead of viewing them as setbacks, embrace them as opportunities to learn. Each error teaches a valuable lesson, honing your skills and making you a more proficient crocheter.
How to Read Crochet Diagram and Graph Patterns
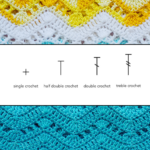
Some patterns include diagrams or graph patterns, which can be a lifesaver for visual learners. These diagrams use symbols to represent different stitches.
- Symbols: Each stitch type has its own symbol. For example, a little “x” might represent a single crochet, and a “T” shape could be a double crochet. Familiarizing yourself with these symbols is crucial for interpreting diagrams accurately.
- Rows and Rounds: Diagrams show how stitches are worked in rows or rounds. Arrows often indicate the direction you should work. Understanding these directions is essential for maintaining the pattern’s integrity.
Translating Symbols to Stitches
Initially, diagrams may seem like a jumble of symbols, but with practice, you’ll learn to translate these symbols into actual stitches. Start with simple diagrams to build your confidence, gradually progressing to more complex patterns as your skills improve.
Utilizing Online Resources
There is a wealth of online resources available for learning how to read crochet diagrams. Video tutorials and blogs can provide step-by-step guidance, offering additional perspectives and tips. Engaging with online crochet communities can also be beneficial, providing support and encouragement.
Practice with Purpose
Regularly practicing with diagrams enhances your ability to interpret patterns visually. Challenge yourself with diverse projects that incorporate various symbols and techniques, broadening your skill set and confidence in handling diagrammatic patterns.
Easy Crochet Patterns for Practice
If you’re a beginner, it’s a good idea to start with simple patterns to build your confidence. Look for projects labeled as “easy” or “beginner-friendly.” These patterns are designed to introduce basic stitches and techniques, providing a solid foundation for more advanced projects.
Building Confidence with Beginner Patterns
Beginner patterns often focus on repetitive stitches and straightforward designs, making them ideal for honing your skills. Projects like dishcloths, scarves, or simple granny squares are excellent starting points. These projects allow for practice without the pressure of complex techniques.
Exploring Different Yarn Types
Experimenting with different yarn types in beginner patterns can enhance your understanding of texture and tension. Try using cotton for dishcloths or soft acrylic for scarves, observing how each yarn behaves with various stitches. This exploration broadens your knowledge and prepares you for more diverse projects.
Establishing a Practice Routine
Consistency is key in mastering crochet skills. Set aside regular time for practice, gradually increasing the complexity of your projects as you gain confidence. This routine fosters improvement and encourages a sense of accomplishment with each completed piece.
Transitioning to Intermediate Patterns
Once comfortable with beginner patterns, gradually transition to intermediate projects. These might include more intricate stitches or simple garment construction. As you progress, you’ll find that each completed project boosts your confidence, motivating you to tackle more challenging designs.
Troubleshooting Common Issues

Crochet, like any craft, comes with its fair share of challenges. From occasional mistakes to puzzling instructions, troubleshooting is an essential skill for every crocheter. Embracing these challenges with a positive attitude can turn obstacles into opportunities for growth.

Exploring types of crochet patterns stitches Techniques
Discover the art of different kinds of crochet stitches with our detailed...

Understanding Crochet RS: Techniques and Tips
Master crochet RS techniques and terms with our guide. Discover what RS...
Step-by-Step Guide to Crochet Joined Rounds
Learn how to master crochet joined rounds with this step-by-step guide. Enhance...
How to teach someone to crochet
Master the art of teaching crochet with step-by-step lessons. Learn how to...


Leave a comment