Creating a Beautiful Crochet Flower Bouquet
Craft a stunning crochet flower bouquet with our easy-to-follow patterns. Perfect for gifts or décor, these crochet flowers add lasting beauty and charm.

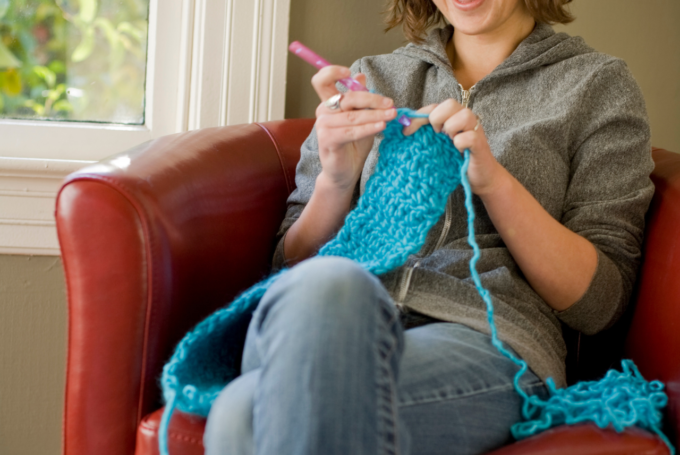
Before we dive into the patterns, let’s talk about why crocheting a bouquet is such a fantastic idea. Unlike real flowers, crochet flowers last forever, don’t require water, and you can customize them any way you like. Plus, they make for a thoughtful handmade gift! Whether it’s a birthday, wedding, or just because, a crochet flower bouquet is sure to bring a smile.

The beauty of crochet flowers lies in their ability to withstand the test of time. Unlike real flowers that wilt and fade, these yarn creations maintain their vibrant colors and structure indefinitely. This makes them perfect for keepsakes and heirlooms, allowing you to cherish special memories for years to come.
Possibilities for personalization
Crochet flowers offer endless possibilities for personalization. You can experiment with different yarn types, colors, and patterns to create a bouquet that truly reflects your personality or that of the recipient. Whether you prefer a classic rose or a whimsical daisy, the choice is yours!
Creating crochet flowers is an environmentally friendly alternative to purchasing fresh blooms. By using yarn, you reduce waste and eliminate the need for water and pesticides associated with live plants. Additionally, crocheting your own bouquet can be more cost-effective than buying fresh flowers, especially if you already have a stash of yarn at home.
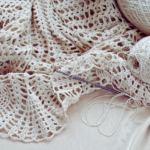
Crochet flower bouquet
To create your crochet flower bouquet, you’ll need a few supplies. Here’s what you’ll want to have on hand:
- Yarn: Go for a variety of colors to make your bouquet pop. Cotton yarn works great for flowers.
- Crochet Hooks: Depending on your yarn, a size 3.5mm to 5mm hook is ideal.
- Floral Wire: To give your flowers stems that can be arranged.
- Scissors: For cutting yarn.
- Tapestry Needle: For weaving in those pesky ends.
Selecting the right yarn is crucial for the texture and appearance of your crochet flowers. Cotton yarn is a popular choice due to its smooth finish and durability. However, don’t shy away from experimenting with different textures like silk or wool blends for a unique look.
The size of your crochet hook can greatly affect the final look of your flowers. A smaller hook will create tighter stitches and a more delicate flower, while a larger hook will result in a looser, more relaxed look. Consider the thickness of your yarn when selecting your hook size.
Beyond the essentials, consider having a few additional tools on hand. A hot glue gun can be useful for securing floral wire or embellishments. Stitch markers can help you keep track of your work, and a row counter can be beneficial for more complex patterns.
This basic crochet flower pattern
This basic crochet flower pattern is perfect for beginners. It’s simple, quick, and adds a lovely touch to your bouquet.

Pattern:
- Start with a magic ring.
- Chain 4 (this counts as the first double crochet and a chain-1 space).
- Double crochet, chain 1 into the ring five more times.
- Tighten the ring and join with a slip stitch to the third chain of the starting chain 4.
- Slip stitch into the next chain-1 space, chain 3, 2 double crochet, chain 3, slip stitch in the same space to form the first petal.
- Repeat in each chain-1 space around.
- Fasten off and weave in the ends.
The magic ring
The magic ring, also known as a magic circle, is a technique that allows you to start your work without leaving a hole in the center. This method is particularly useful for creating flowers, as it results in a neat and professional finish.
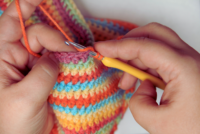
Slip stitches are essential for joining rounds and creating seamless transitions in your crochet work. Practice making slip stitches to ensure your flowers have a polished appearance. Remember, consistency is key in achieving a uniform look.
Weaving in ends can be tedious, but it’s crucial for the durability of your crochet flowers. Use a tapestry needle to secure the yarn tails, and weave them back and forth through the stitches to prevent unraveling over time.
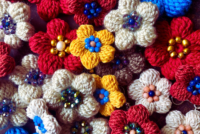
These small crochet flowers are perfect for filling in gaps in your bouquet and adding a touch of whimsy.
Pattern:
- Chain 4 and join with a slip stitch to form a ring.
- Chain 3, 2 double crochet, chain 3, slip stitch into the ring to create a petal.
- Repeat four more times until you have five petals.
- Fasten off and weave in the ends.
The formation of petals is what gives your crochet flowers their distinctive shape. Pay attention to your tension and the uniformity of your stitches to ensure each petal is the same size and shape. This consistency will enhance the overall aesthetic of your bouquet.
Once you’ve mastered the basic small flower pattern, don’t hesitate to explore variations. Try adding more petals, using different stitch types, or incorporating multiple colors to create unique and personalized flowers.
Just like with the basic flower, weaving in ends is crucial for these small flowers. A neatly finished flower not only looks better but also ensures longevity, allowing your bouquet to be enjoyed for years without worry of unraveling.
Once you’ve made a variety of flowers, it’s time to assemble your bouquet. Here’s how to do it:
Use floral wire to create stems for your flowers. Cut the wire to your desired length and attach it to the back of each flower using a tapestry needle and some yarn.
The type of floral
The type of floral wire you choose will affect the stability and flexibility of your bouquet. Thicker wire provides more stability but may be harder to manipulate, while thinner wire offers flexibility but less support. Consider the size and weight of your flowers when making your choice.

Attaching the floral wire securely is crucial to ensure your flowers stay in place. Use a tapestry needle and yarn to stitch around the wire and through the back of the flower, creating a snug fit. This will prevent the wire from slipping and ensure your bouquet holds its shape.
Consider wrapping the floral wire with floral tape for a more polished finish. This not only enhances the aesthetic appeal but also provides additional grip and stability, making the bouquet easier to handle and arrange.
Arrange your flowers in a way that pleases you. Mix and match colors and sizes for a natural look. Once you’re happy with the arrangement, twist the wires together to hold the bouquet in place.
When arranging your flowers, think about the balance of colors and textures. Combining different shades and yarn types can create visual interest and make your bouquet more dynamic. Aim for a harmonious yet varied look to capture the essence of a natural bouquet.
To make your bouquet more visually appealing, consider creating a focal point. This could be a larger flower or a unique color that draws the eye. Position this focal point centrally or off-center, depending on your desired effect.
Once you’re satisfied with your arrangement, twist the floral wires together to secure the flowers in place. This ensures that your bouquet remains intact and can withstand handling, display, and gifting without losing its shape.
If you want to add some greenery, crochet a few leaves and attach them to the stems. Here’s a simple leaf pattern:
Leaf Pattern:
- Chain 10.
- Single crochet in the second chain from the hook and in each chain across.
- Turn and work back down the other side of the chain, single crocheting in each chain.
- Fasten off and attach to the stem.
Leaves add a touch of realism and contrast to your bouquet. Experiment with different leaf shapes and sizes to complement your flowers. Long, slender leaves can add elegance, while broader leaves provide a lush, full appearance.
Ensure your leaves are securely attached to the stems. Use yarn and a tapestry needle to stitch them in place, hiding any visible ends within the flowers or wrapping them around the stem for a seamless look.
Don’t be afraid to mix different shades of green or even add a pop of color with contrasting leaves. This variety can make your bouquet more interesting and visually appealing, enhancing the overall design.
- Mix Textures: Use different yarns and stitch patterns for added texture.
- Color Coordination: Stick to a color palette for a cohesive look or go wild with a rainbow of hues.
- Experiment: Try different flower patterns and sizes to see what looks best in your bouquet.
Experiment with different yarn types to add texture and dimension to your bouquet. Consider using a combination of smooth cotton, textured wool, and silky blends to create a rich, varied look that mimics the diversity of a real flower arrangement.
A well-coordinated color palette can make your bouquet look professional and polished. Choose complementary colors for a harmonious feel, or use contrasting colors for a bold statement. Use color theory as a guide to selecting shades that work well together.
Conclusion
Don’t be afraid to get creative with your flower patterns. Explore intricate lace designs, layered flowers, or even multi-colored blooms. The more you experiment, the more unique and personalized your bouquet will become.
And there you have it, a beautiful crochet flower bouquet that you crafted with love. Whether it’s for your home, a gift, or just because, these crochet flowers are sure to brighten any day. So next time you find yourself with a little extra yarn and some time, remember this guide and let your creativity bloom!
Happy crocheting, and may your flowers always be in full bloom!


Exploring types of crochet patterns stitches Techniques
Discover the art of different kinds of crochet stitches with our detailed...

Understanding Crochet RS: Techniques and Tips
Master crochet RS techniques and terms with our guide. Discover what RS...
Step-by-Step Guide to Crochet Joined Rounds
Learn how to master crochet joined rounds with this step-by-step guide. Enhance...
How to teach someone to crochet
Master the art of teaching crochet with step-by-step lessons. Learn how to...


Leave a comment