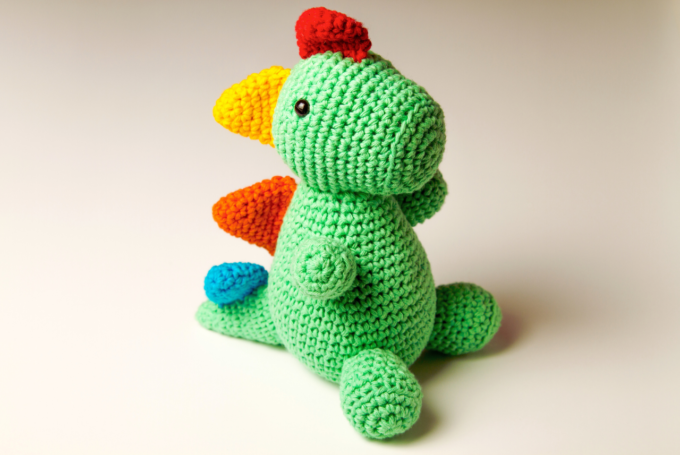
How to Create Your Own Amigurumi Dragon Patterns
Unleash your creativity with our guide on crafting your own amigurumi dragon patterns. Discover tips for crocheting dragons of all sizes, from cute miniatures to large statement pieces, complete with free patterns and customization ideas.

Before you can start crocheting your dragon, you’ll need to gather a few essential materials. Here’s what you’ll need:
- Yarn: Choose a yarn that suits your dragon’s desired look. For a cute crochet dragon, consider soft, pastel shades. If you’re aiming for a more traditional dragon, opt for green or red hues. Additionally, you might experiment with variegated yarn for a unique, multicolored effect that can make your dragon truly one-of-a-kind.
- Crochet Hooks: The size of your hook will depend on the thickness of your yarn. Check your yarn label for recommendations. Beginners might start with a medium-sized hook and medium-weight yarn for ease of handling, while more experienced crocheters might enjoy the challenge of working with finer threads for delicate details.
- Stuffing: Fiberfill is commonly used to stuff amigurumi to give it a plush, soft feel. Alternatively, you can use eco-friendly stuffing options like recycled polyester or wool roving, which can also add a different texture to your finished piece.
- Safety Eyes: These add a playful touch to your dragon. You can also embroider eyes with yarn or thread for a more personalized look. Consider experimenting with different sizes and colors to give your dragon a unique personality.
- Tapestry Needle: This will be used to weave in the ends and sew the parts together. A needle with a large eye and a blunt tip is ideal for working with yarn, ensuring that you can easily stitch your dragon’s parts together without splitting the yarn.
Once you have all your materials, you’re ready to start crocheting! Take a moment to organize your tools and materials, ensuring everything is within reach to maintain a smooth workflow as you bring your amigurumi dragon to life.

When it comes to creating dragon amigurumi, size matters! Here’s how you can decide which size to make:
A large dragon is perfect if you want a statement piece. These patterns might take longer to complete but are worth the effort for a striking result. Large dragons can be great for gifts or as a decorative item in a nursery. The size allows for more intricate details, such as textured scales or elaborate wings, making it a rewarding project for those who enjoy a challenge.
Moreover, large dragons can serve as comforting companions for children or as whimsical home decor items that add a touch of fantasy to any room. When choosing a large dragon pattern, consider how it will fit into the intended space and its purpose, whether for play or display.
Small dragons are ideal for beginners or those short on time. They’re quick to make and equally charming. Plus, they’re perfect for kids to carry around! The smaller size makes them excellent for practicing new techniques or testing color combinations without a significant time commitment.
These petite dragons can also be part of a larger project, such as a mobile for a baby’s crib or a series of dragon-themed ornaments. Their compact size makes them versatile and easy to transport, ensuring that your creative work can be shared and appreciated on the go.
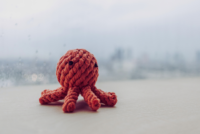
Mini dragons are adorable and can be a fun challenge for crocheters looking to create intricate designs. They’re perfect for keychains or as a pocket companion. Their diminutive size requires precision and patience, making them ideal for honing your crochet skills.
These miniatures can also serve as unique gifts or party favors, allowing you to share a bit of your creativity with others. Consider crafting a series of mini dragons in various colors or poses to create a collection that showcases your skill and imagination.

Before you begin, familiarize yourself with some basic crochet stitches and techniques. Here are a few you’ll likely use:
- Chain Stitch (ch): This is the foundation of most crochet projects. Practicing even and consistent chains will ensure a solid base for your dragon.
- Single Crochet (sc): A basic stitch used throughout amigurumi, essential for creating dense, sturdy fabric that holds the stuffing well.
- Slip Stitch (sl st): Used to join pieces or finish off your work. It’s an invaluable technique for seamless finishing.
- Increase (inc): Add stitches to make your work wider. This technique is crucial for shaping your dragon’s body and features.
- Decrease (dec): Reduce stitches to narrow your work. Mastering this will help you create smooth transitions and refined shapes.
Understanding these stitches will give you the confidence to tackle your dragon project. Practice each technique on a small swatch before starting your dragon to ensure your tension and technique are consistent.
Start with the body of the dragon. Most amigurumi patterns begin with a magic ring, which is the foundation for your dragon’s shape.
- Magic Ring: Create a loop and single crochet into the ring. This technique allows for a tight, closed center, ideal for amigurumi projects.
- Increase Rounds: Work in continuous rounds, increasing stitches to shape the body. Consistency is key here to maintain the correct shape and size.
- Stuff as You Go: Remember to stuff your dragon as you crochet to maintain its shape. Adding stuffing gradually ensures even distribution and prevents lumps or gaps.
Taking your time with these initial steps sets the stage for a well-crafted dragon. Consider using stitch markers to keep track of your rounds and increases.
The head is often the most detailed part of your dragon. Here’s a quick outline:
- Start with a Magic Ring: Again, begin with a magic ring and increase to form a sphere. This provides a solid base for the dragon’s features.
- Add Safety Eyes: Securely attach safety eyes or embroider them before closing the head. Proper placement is crucial for a balanced, expressive face.
- Add Details: Consider adding nostrils or horns using small crochet pieces. These elements can be customized to give your dragon a unique personality.
Taking care in designing the head ensures that your dragon has character and charm. Experiment with different facial expressions or features to bring your vision to life.
These smaller parts add character to your dragon. You can customize the shape and size based on your design preference.
- Wings: Usually made with a combination of chain stitches and single crochets to form a triangular shape. You can add wire for structure if desired.
- Arms and Legs: Simple tubes or cones that can be stuffed lightly. Consider adding claws or other details for added realism.
These components allow for creative expression, enabling you to craft a dragon that is uniquely yours. Experiment with different shapes and positions to see what best fits your vision.
Once all the pieces are crocheted, it’s time to bring your dragon to life!
- Position Parts: Arrange the parts to see how they fit together before sewing. This step helps ensure proper alignment and balance.
- Sew with Tapestry Needle: Use your needle to sew parts together, starting with the head and body, then attaching limbs and wings. Take your time to ensure secure, neat seams.
Careful assembly is crucial to the overall appearance and durability of your amigurumi dragon. Make adjustments as needed to achieve the desired look and pose.
Get creative with embellishments like:
- Embroidery: Add scales or patterns with embroidery thread. This can add texture and visual interest to your dragon’s surface.
- Spikes and Horns: Use small, crocheted cones to create spikes along the back or horns on the head. These features can be customized to match your dragon’s personality.
- Color Accents: Mix in different yarn colors for a vibrant, unique look. Consider using contrasting colors for added impact.
Embellishments allow you to add personal touches that make your dragon stand out. Experiment with different techniques and materials to see what best complements your design.
- Experiment with Colors: Don’t be afraid to mix and match colors for a whimsical dragon. This can highlight different features or create a cohesive theme.
- Adjust Sizes: Play with stitch counts to make parts larger or smaller as desired. This can help you achieve the perfect proportions for your dragon.
- Use Different Textures: Combine different yarn textures for an interesting feel. This can add depth and dimension to your dragon’s appearance.
Personalization is the key to making your amigurumi dragon truly your own. Let your imagination guide you in creating a one-of-a-kind masterpiece.
Congratulations on creating your own amigurumi dragon! Now it’s time to show it off. Share your dragon with friends, family, or fellow crocheters online. You can even create a free crochet dragon pattern PDF to share your design with others. Consider starting a blog or social media account to document your crochet journey and connect with a community of fellow enthusiasts.
Remember, the most important part is to have fun and let your creativity soar! Whether you’re crocheting a large, show-stopping dragon or a tiny, cute companion, each stitch is a step in bringing your imaginative creation to life. Enjoy the process, and take pride in the magical creature you’ve brought into the world. Happy crocheting!

Easy Free Crochet Chicken Pattern Tutorial
Create your own charming crochet companion with this easy, free crochet chicken...
Create Your Own Dinosaur Crochet Pattern
Craft your own dinosaur crochet pattern with ease! Discover tips and free...

Leave a comment